Troubleshooting Guide
Having some trouble? We’ve created this guide to help you through our online proctoring process. Good luck on your exam! For more test-taker guides and materials, please visit our Resources page.
4 easy steps to get started:
1. Chrome is required. Make sure you are not in private, incognito, or full-screen mode. Click here to download Chrome.
2. Examity requires access to third party cookies. Before starting your exam, make sure cookies are allowed.
To allow cookies in Google Chrome:
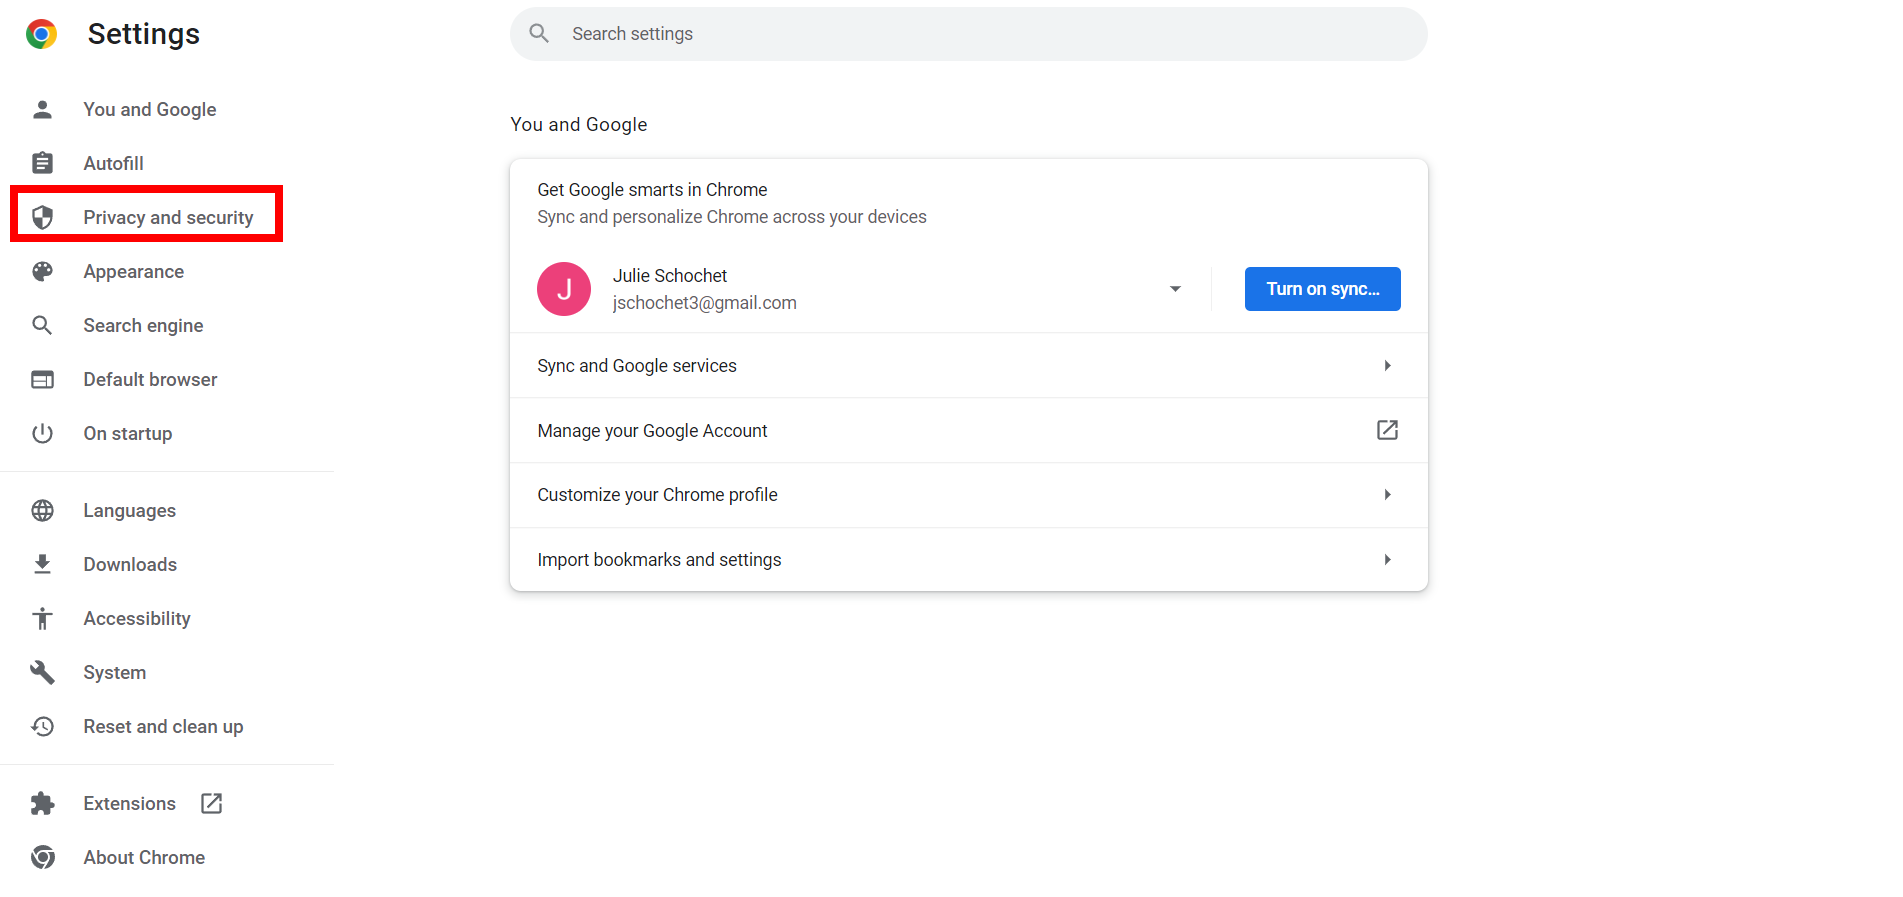
A. Go to Chrome settings and click on “Privacy and security.”
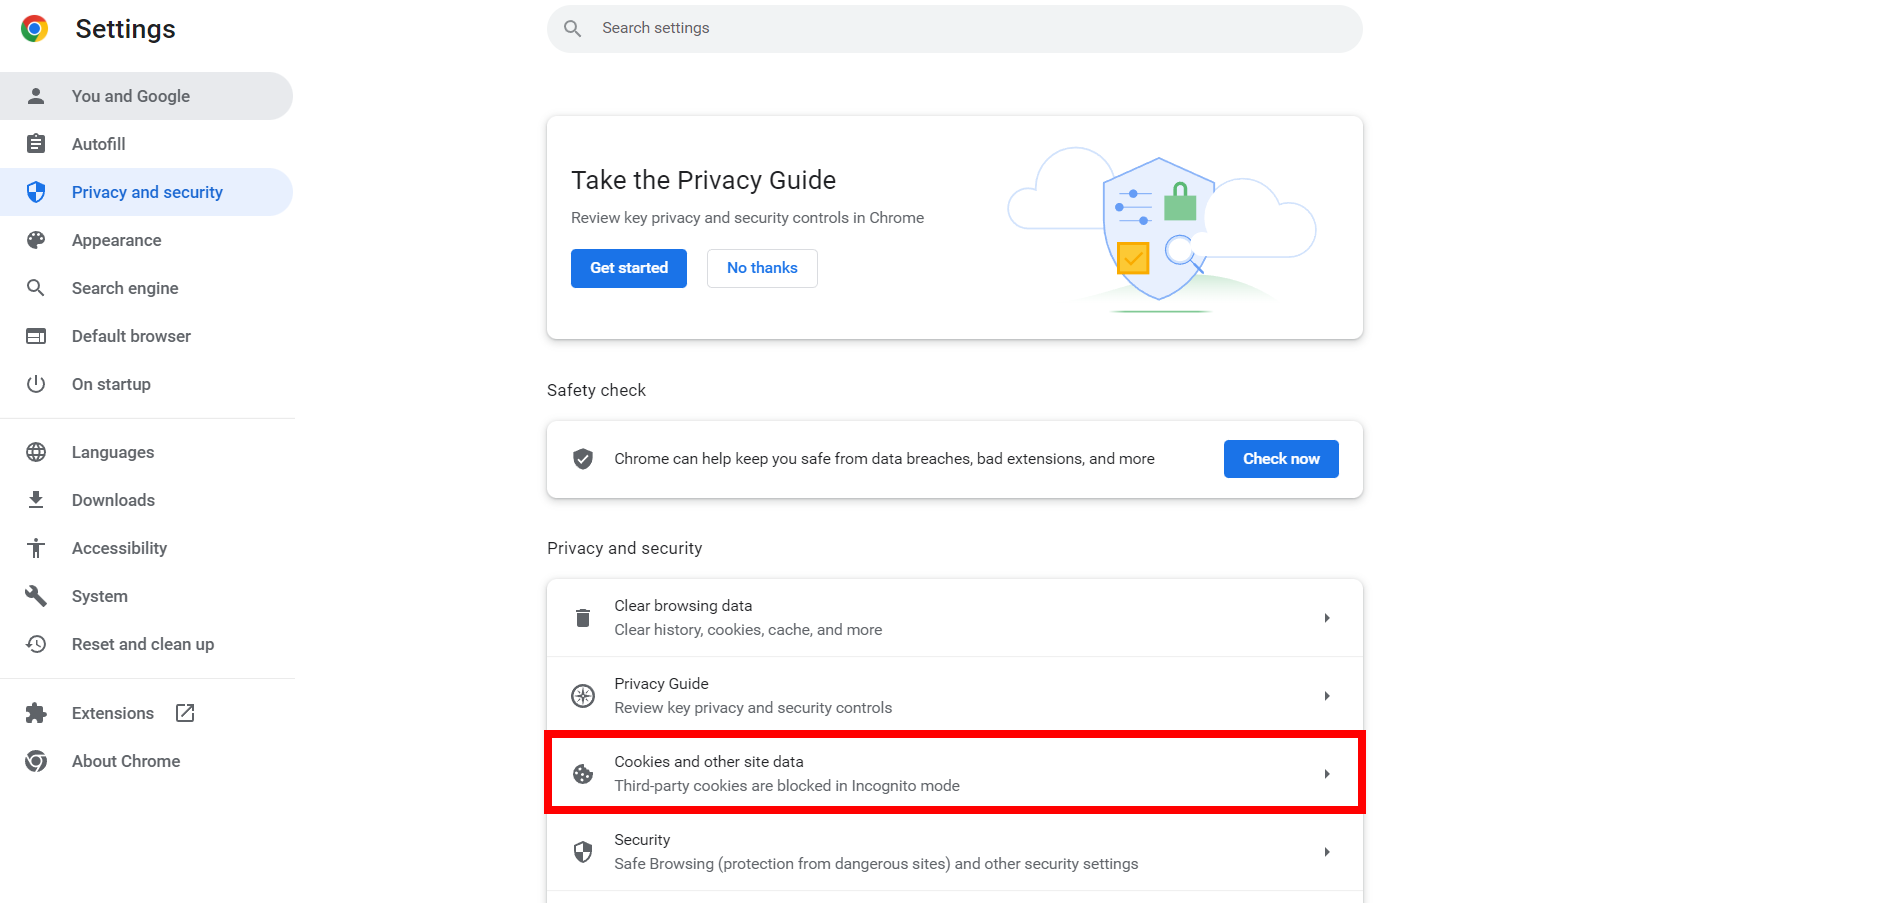
B. Then, navigate to “Cookies and other site data” and select it.
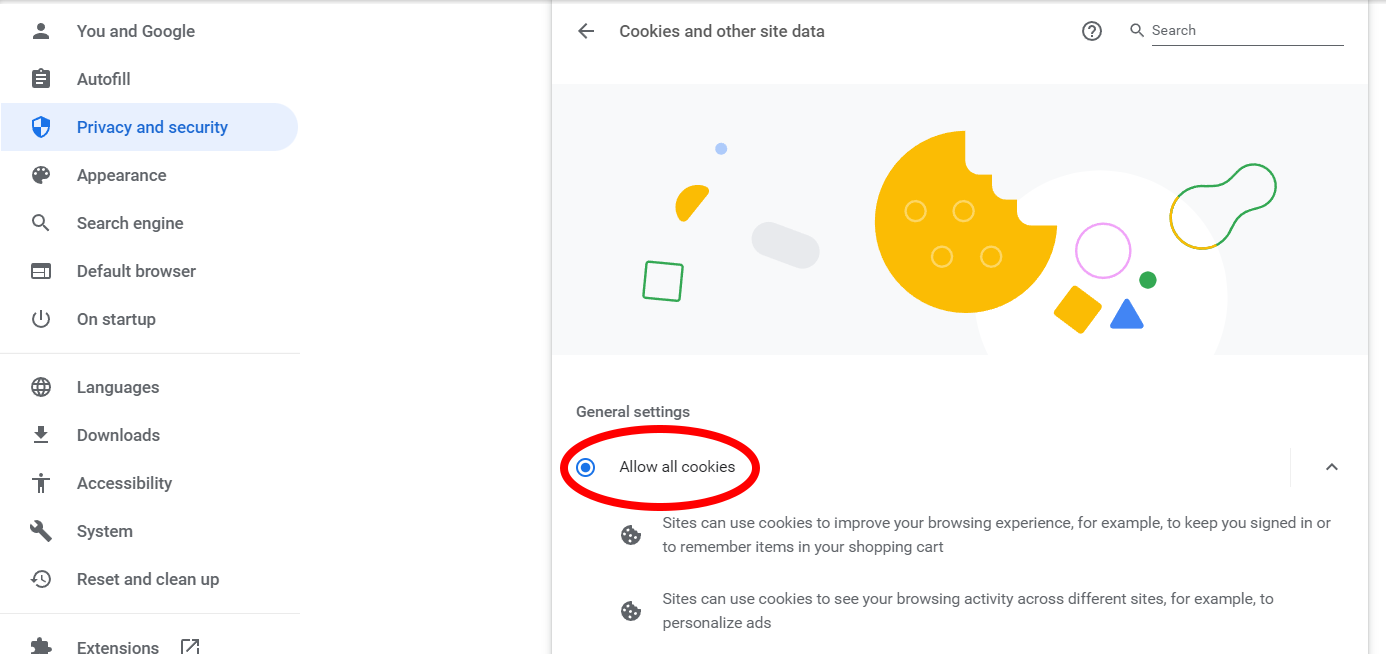
C. From there, select the circle next to “Allow all cookies.”
D. After, you may need to refresh your browser or close out of Chrome.
E. If you closed out of Chrome, open it again, and then log back into Examity.
3. Uninstall or disable all Chrome extensions, pop-up blockers, and ad blockers, except for the Examity Proctoring extension.
4. You’ll need at least 2Mbps of upload and download speed to complete your exam on Examity. Always run Examity’s system check before you start your exam.
3 things to remember before your exam:
2. Switch off applications that use your camera and screenshare. You must grant access to your webcam and microphone in order to proceed to your exam. For macOS users, please click here for instructions on how to enable screen share.
3. Bring your ID. Find out more about Examity’s policy.
Time Zone Settings:
Make sure your time zone is set to the location you will be testing in. Where you will be testing may be in a different time zone than the time zone of your test institution or organization.
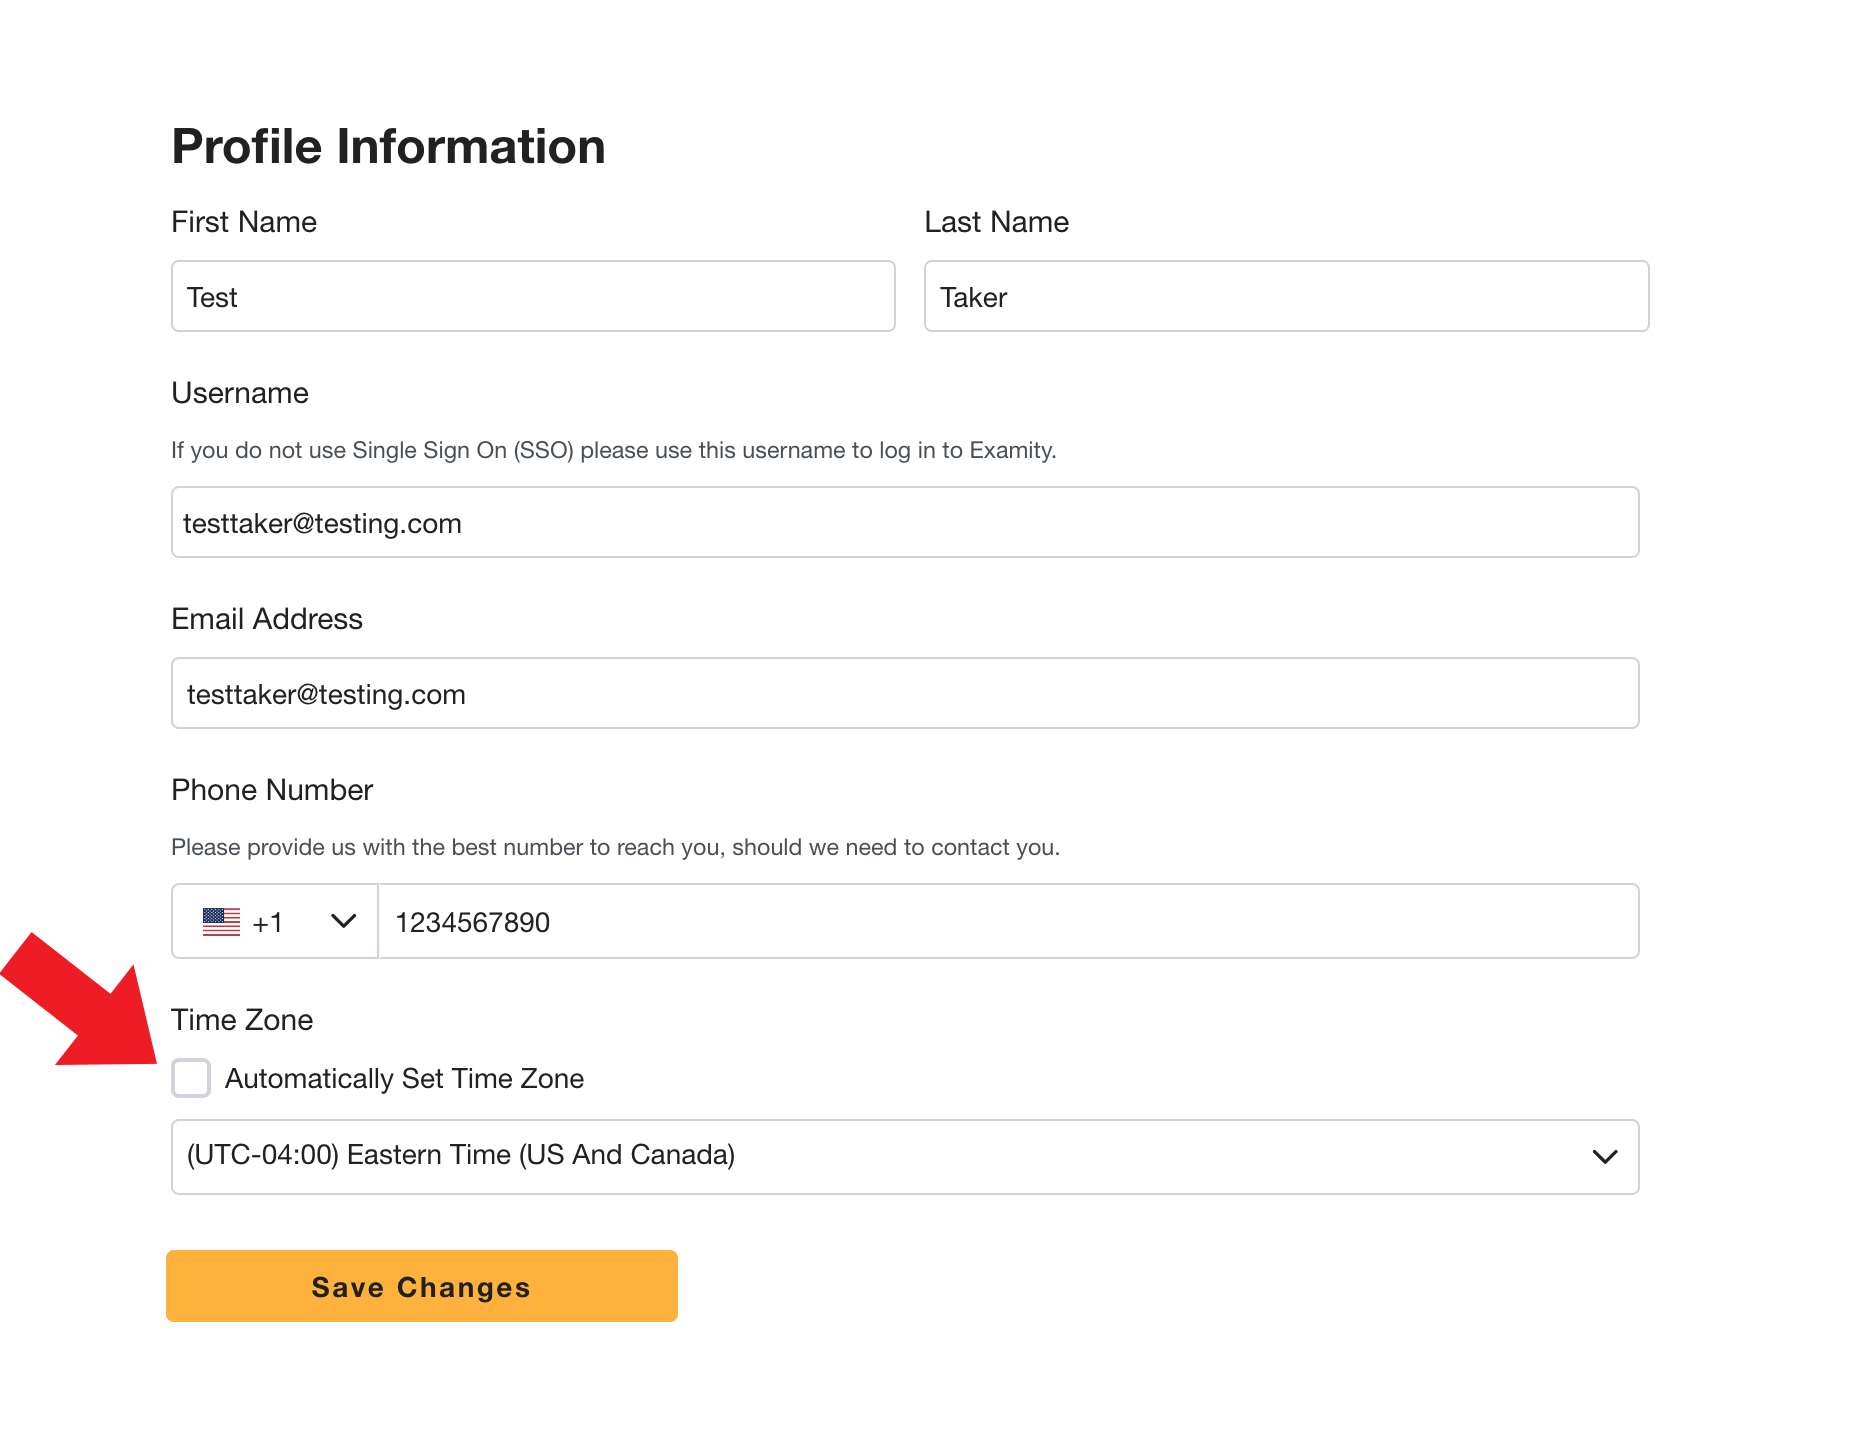
To set your time zone, click “Profile” at the top of your Examity dashboard. If you have the box next to “Automatically Set Time Zone” checked, your time zone will update automatically. If the time is different, set the time zone manually. Then, select the proper region and time zone.
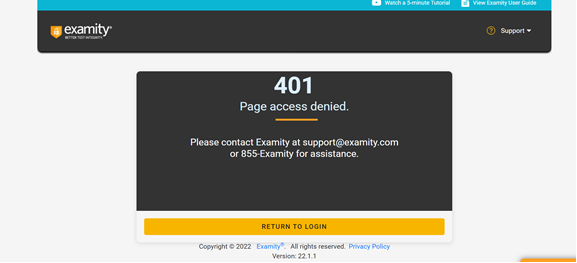
When logging in, you may encounter a 401 error, which could happen if your time and date settings haven’t been updated or refreshed on your computer.
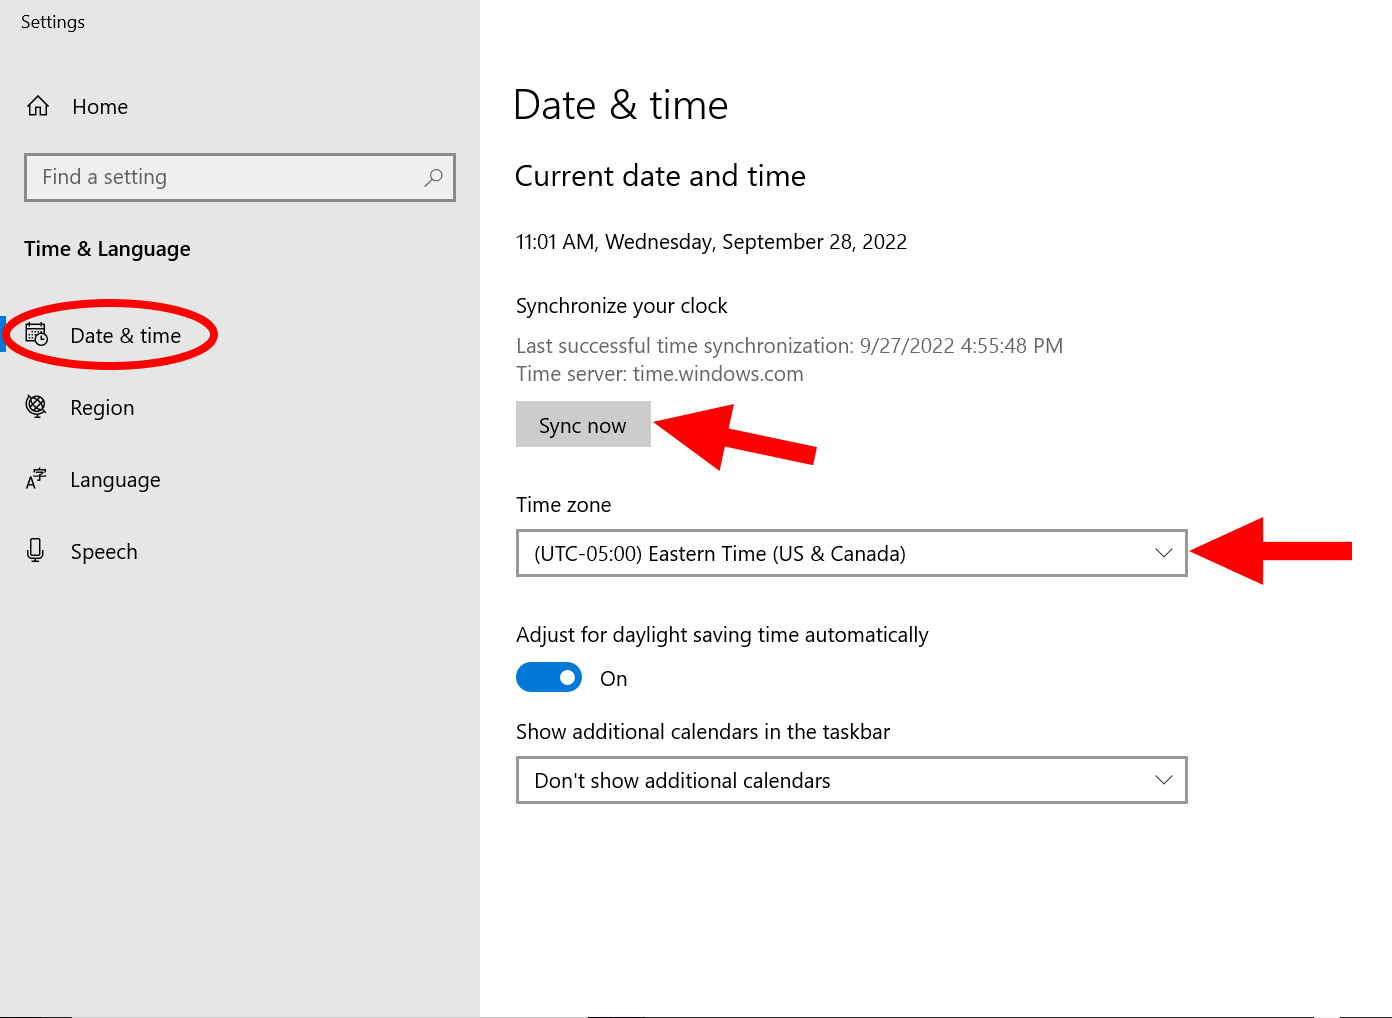
- To fix the error, navigate to your computer’s time and date settings.
- Set it so that both the date and time are set automatically to force a refresh.
- Next, clear your Chrome browser’s cache, and then restart your Chrome browser.
- Log into Examity again.
Permissions:
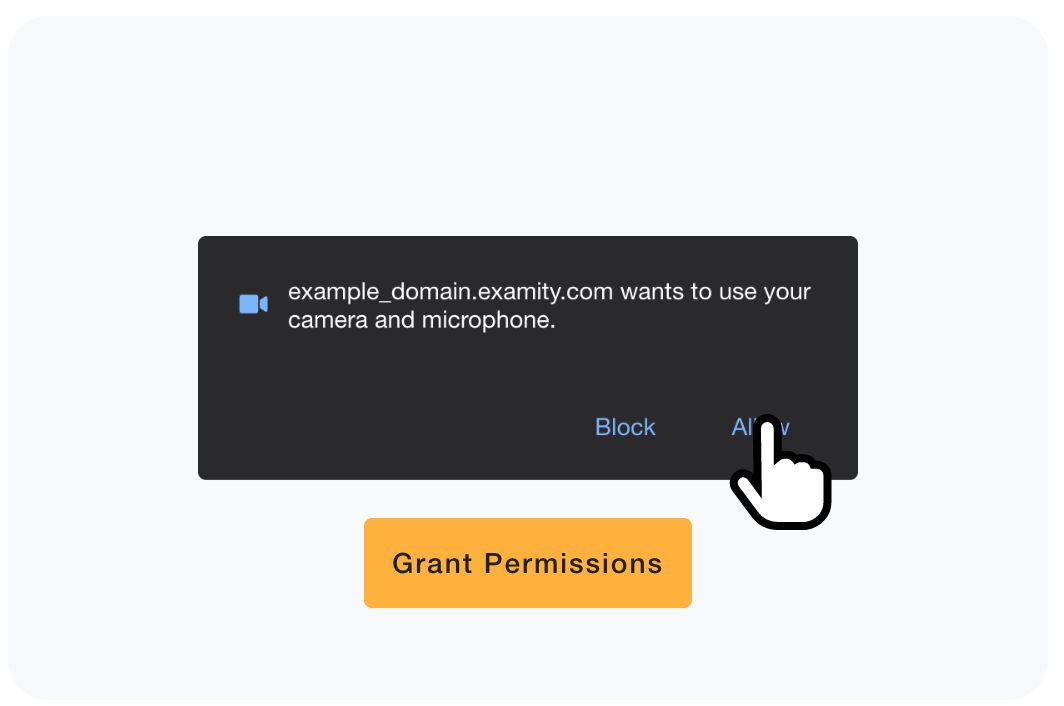
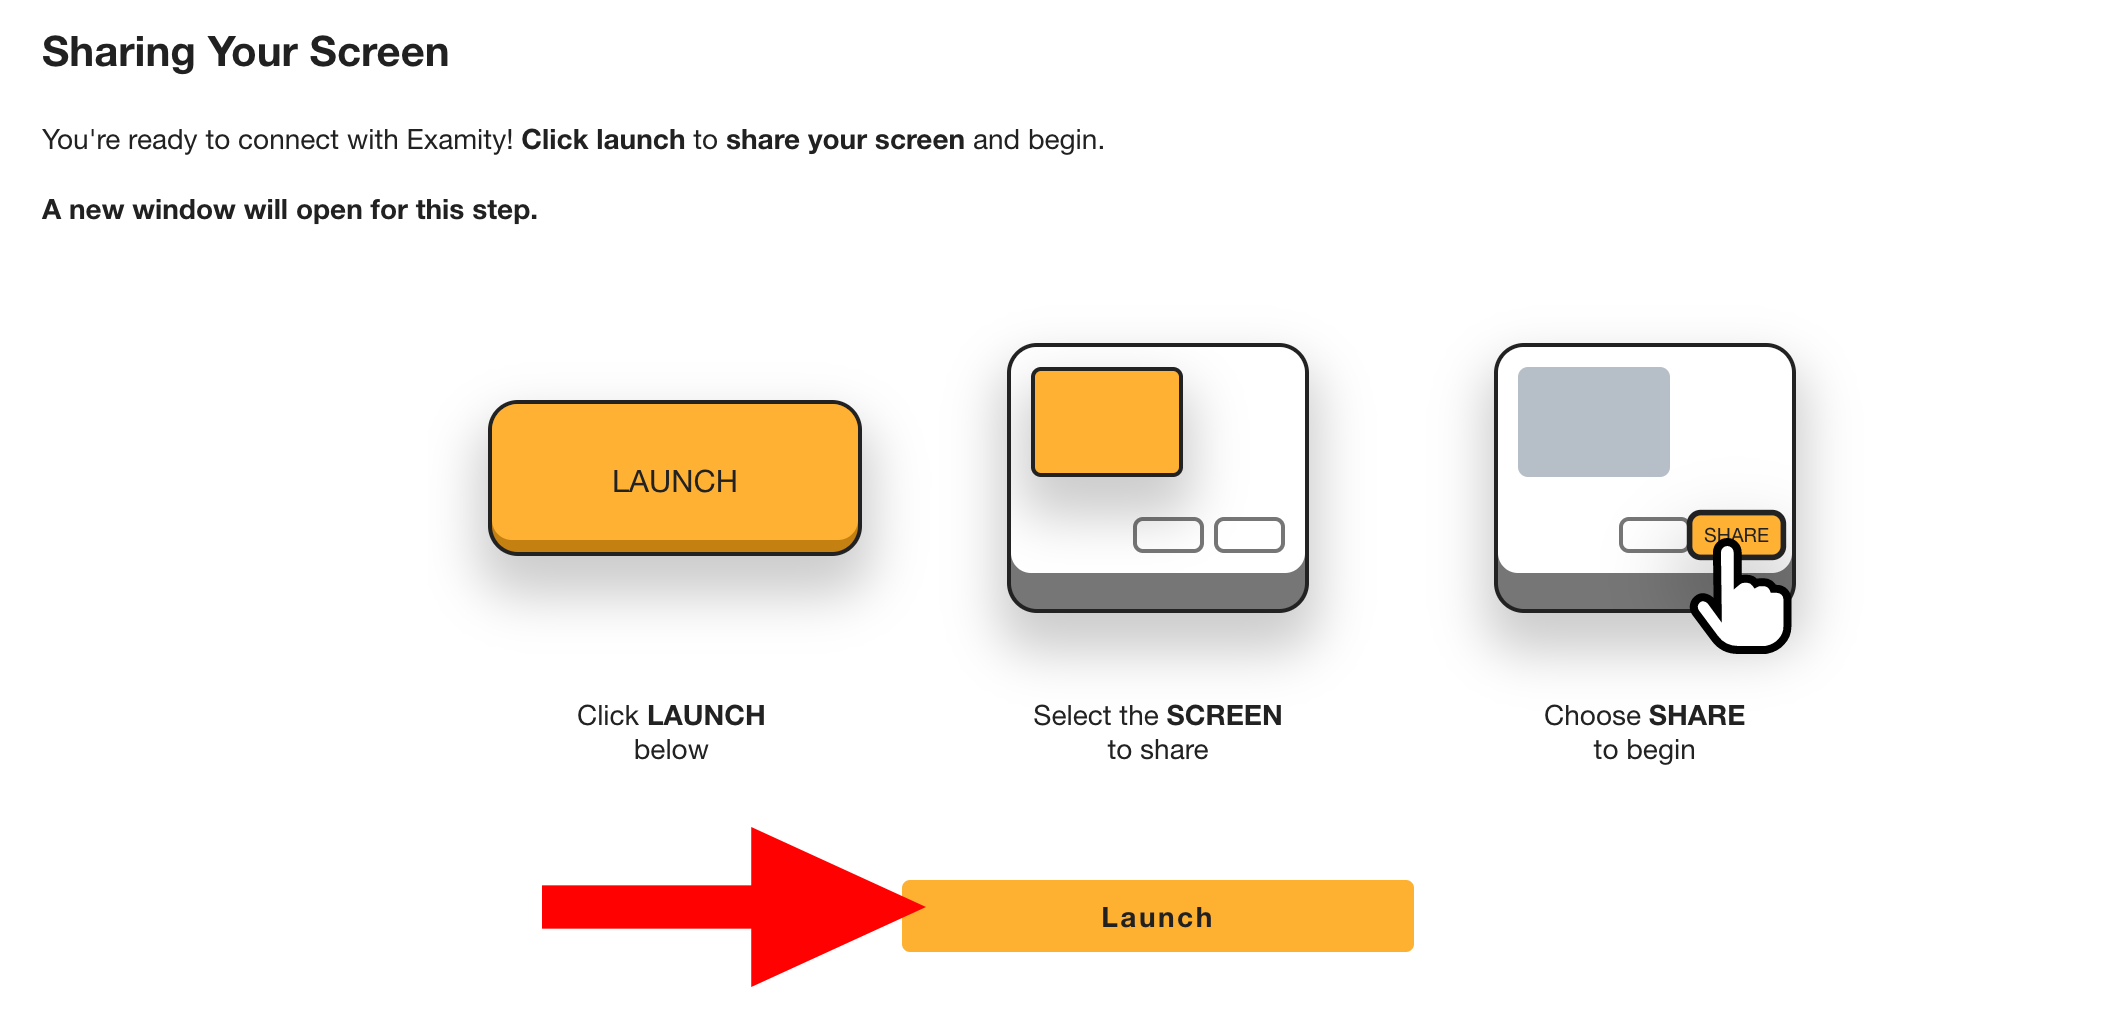
A pop-up will appear to give Examity access to your camera and microphone. Please select “Allow” if you are using a computer that uses a Windows operating system.
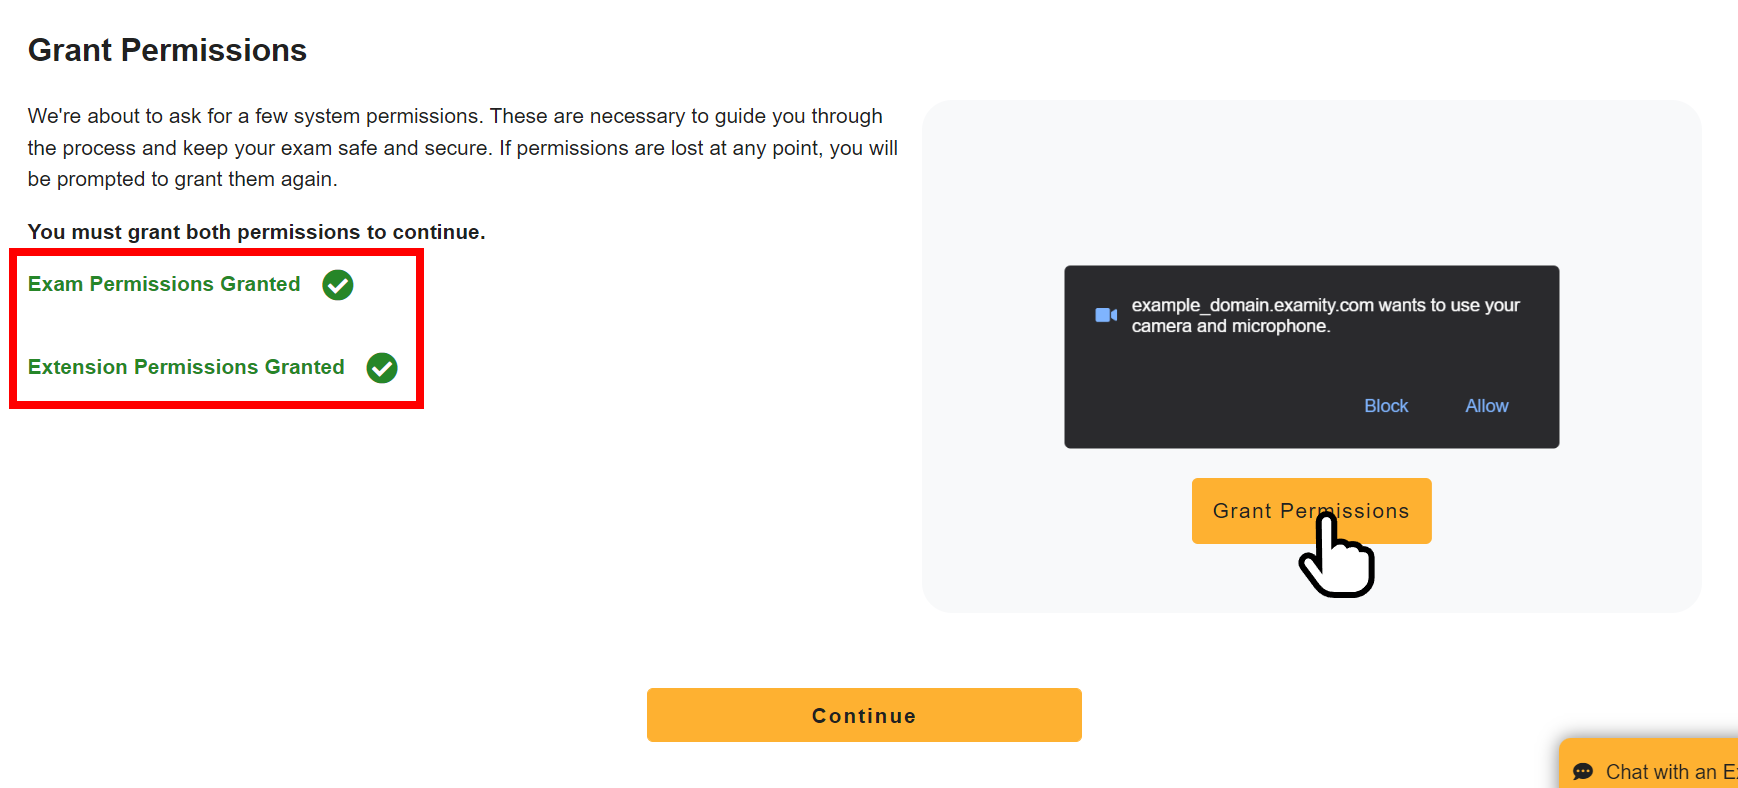
You will know if permissions have been granted if both green check marks appear.
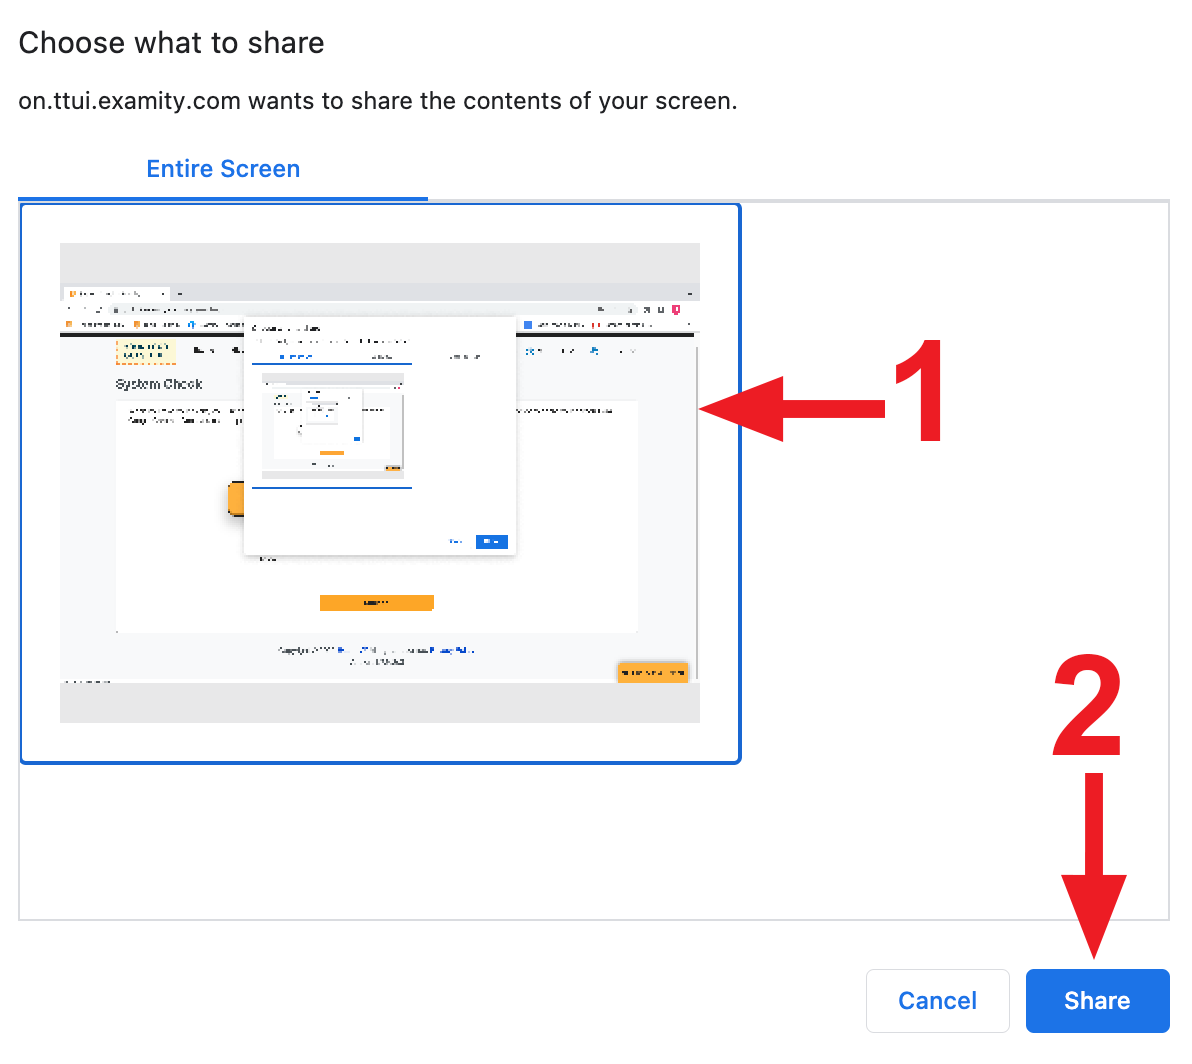
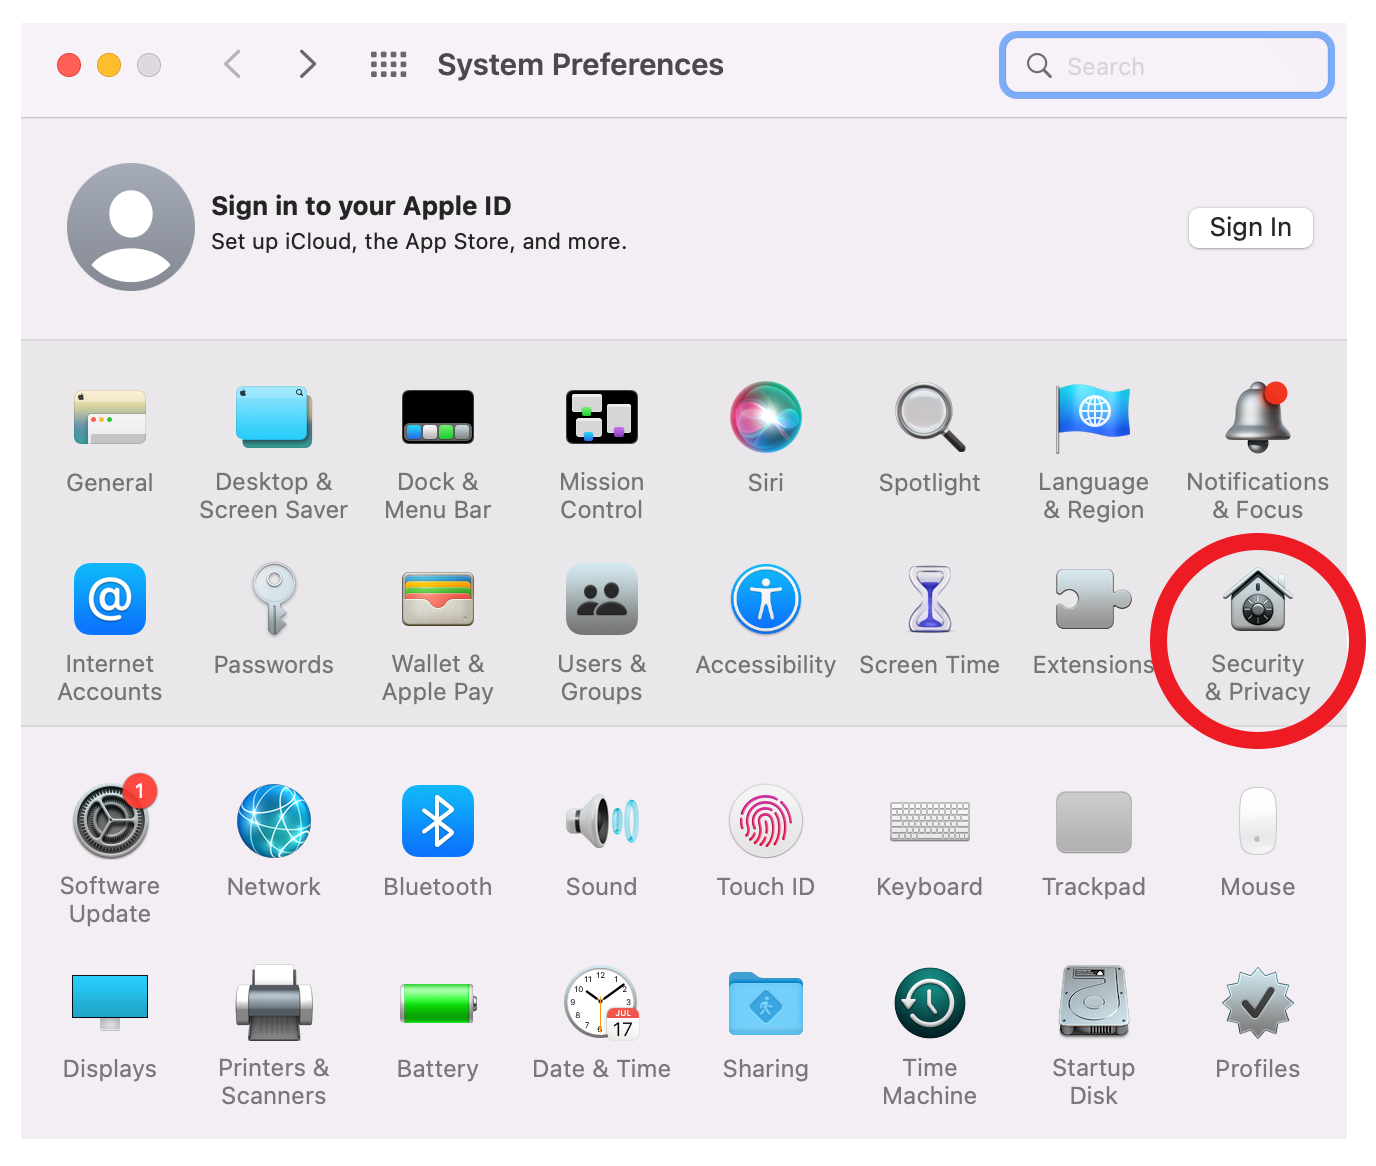
For macOS users, you may need to “allow” your browser to record your screen through your Mac’s “System Preferences.” Here are some helpful resources to find this setting.
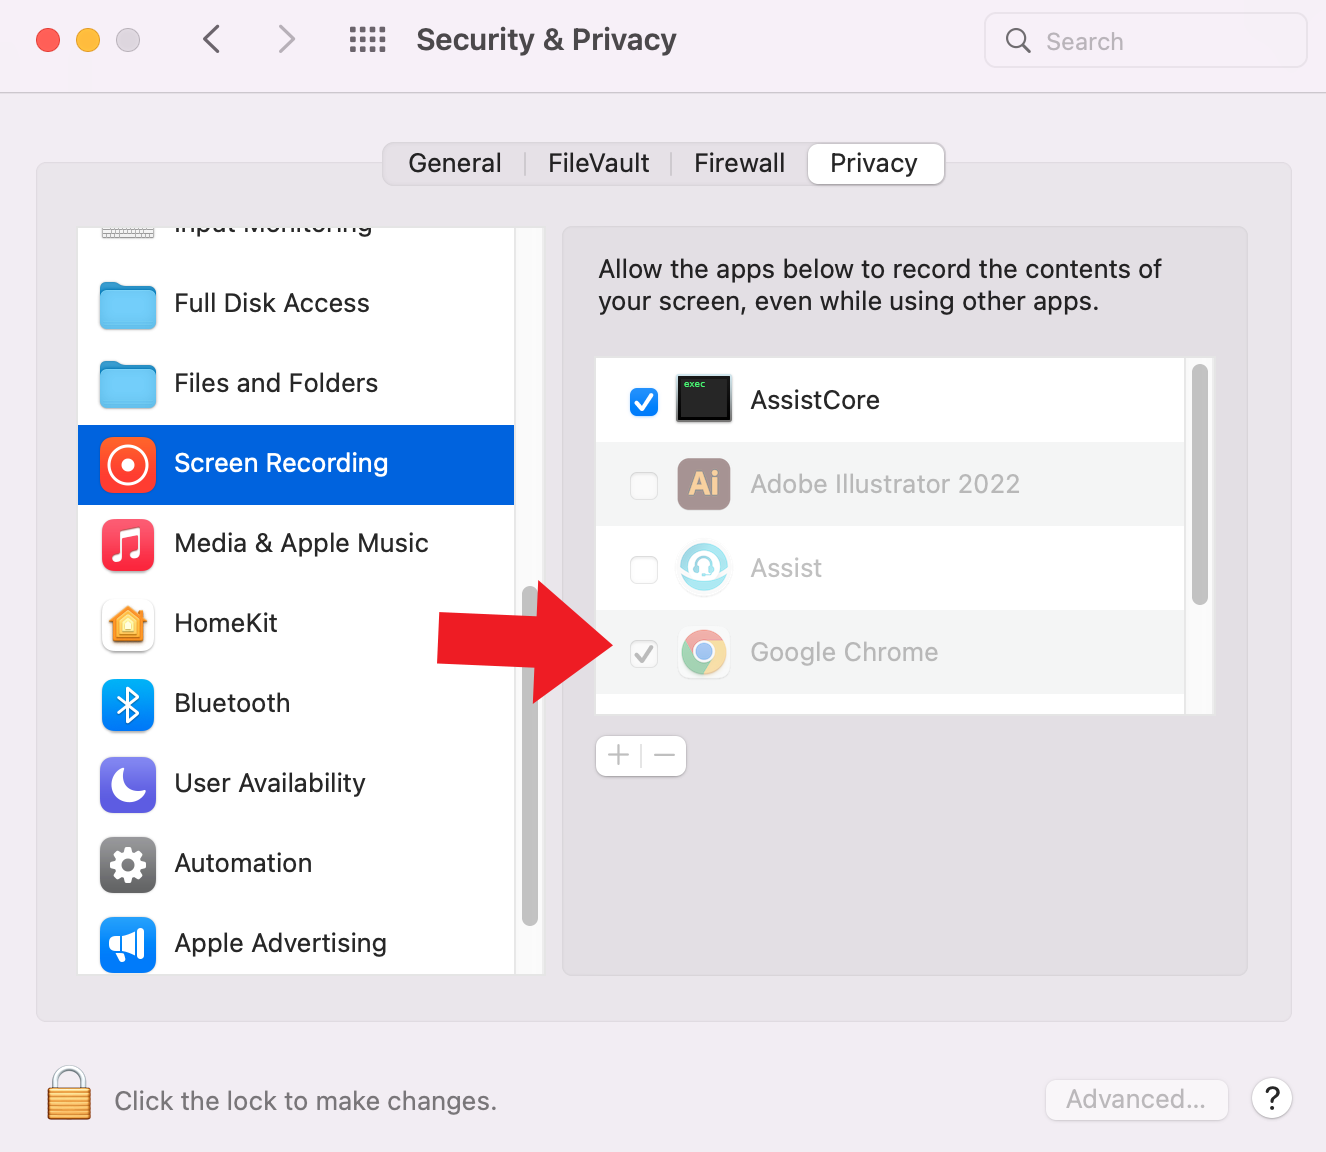
Please note: Google Chrome won’t appear unless we’ve previously asked to share your screen.
After completing the following steps, you must force quit Chrome for the changes to work. If you simply close or restart the browser, the new settings won’t take effect.
1. To enable screenshare in macOS, go to your “System Preferences,” and then “Security & Privacy.”
2. Next, scroll to “Screen Recording.” Click on the lock on the bottom left corner, and then type in your administrator username and password.
3. Finally, select the checkbox next to Google Chrome, and select the lock again to save your changes.
Exam Passwords:
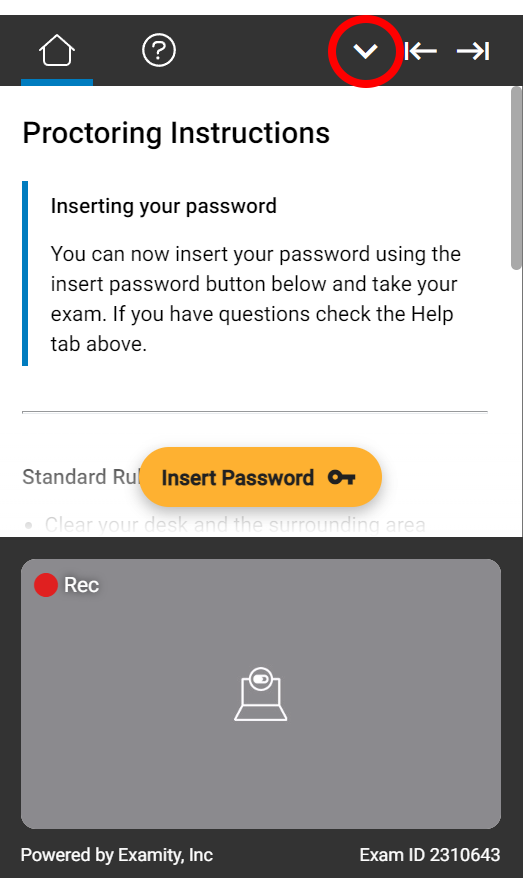
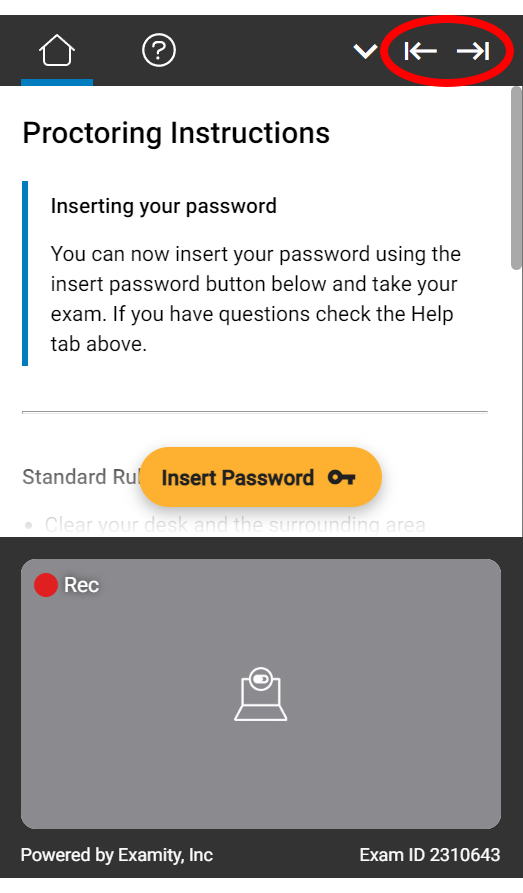
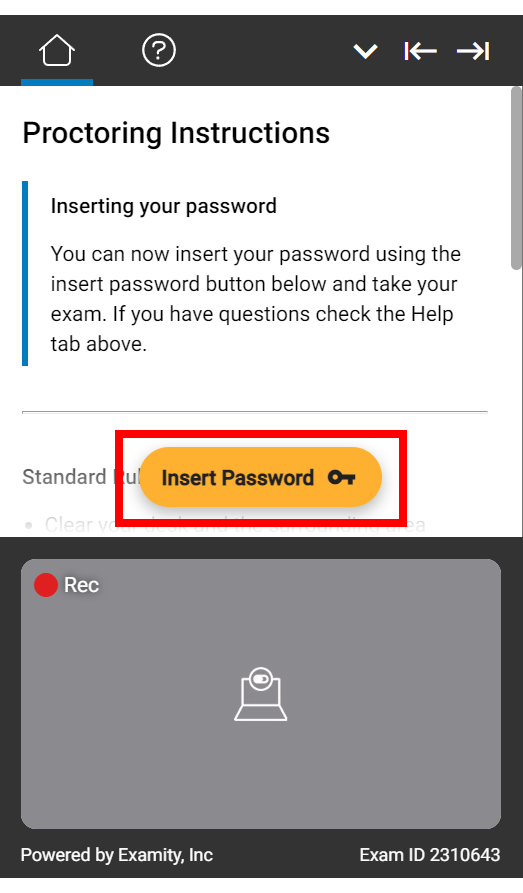
To insert the exam password, click on the button labeled “Insert Password” in the Examity sidebar
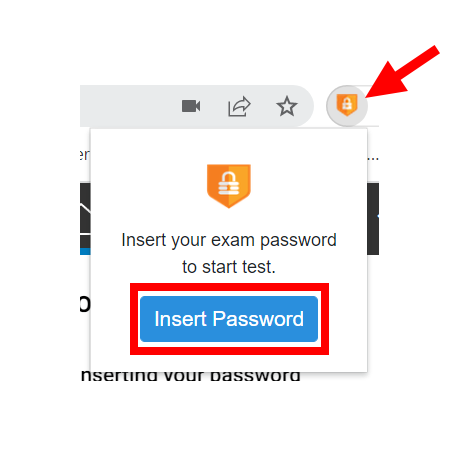
If you cannot insert the password using the sidebar, click the Examity extension located at the top right of your browser. Then, select “Insert Password.”
If your password is not working:
Option 1: Enter text into the box and delete it before selecting the “Insert Password” button.
Option 2: Once the password has been pasted in, add a space and then delete the space before submitting the password again.
Starting Over:
If you have trouble logging into Examity or related pre-exam issues, you should clear your Chrome browsing data . Then, restart your Chrome browser.
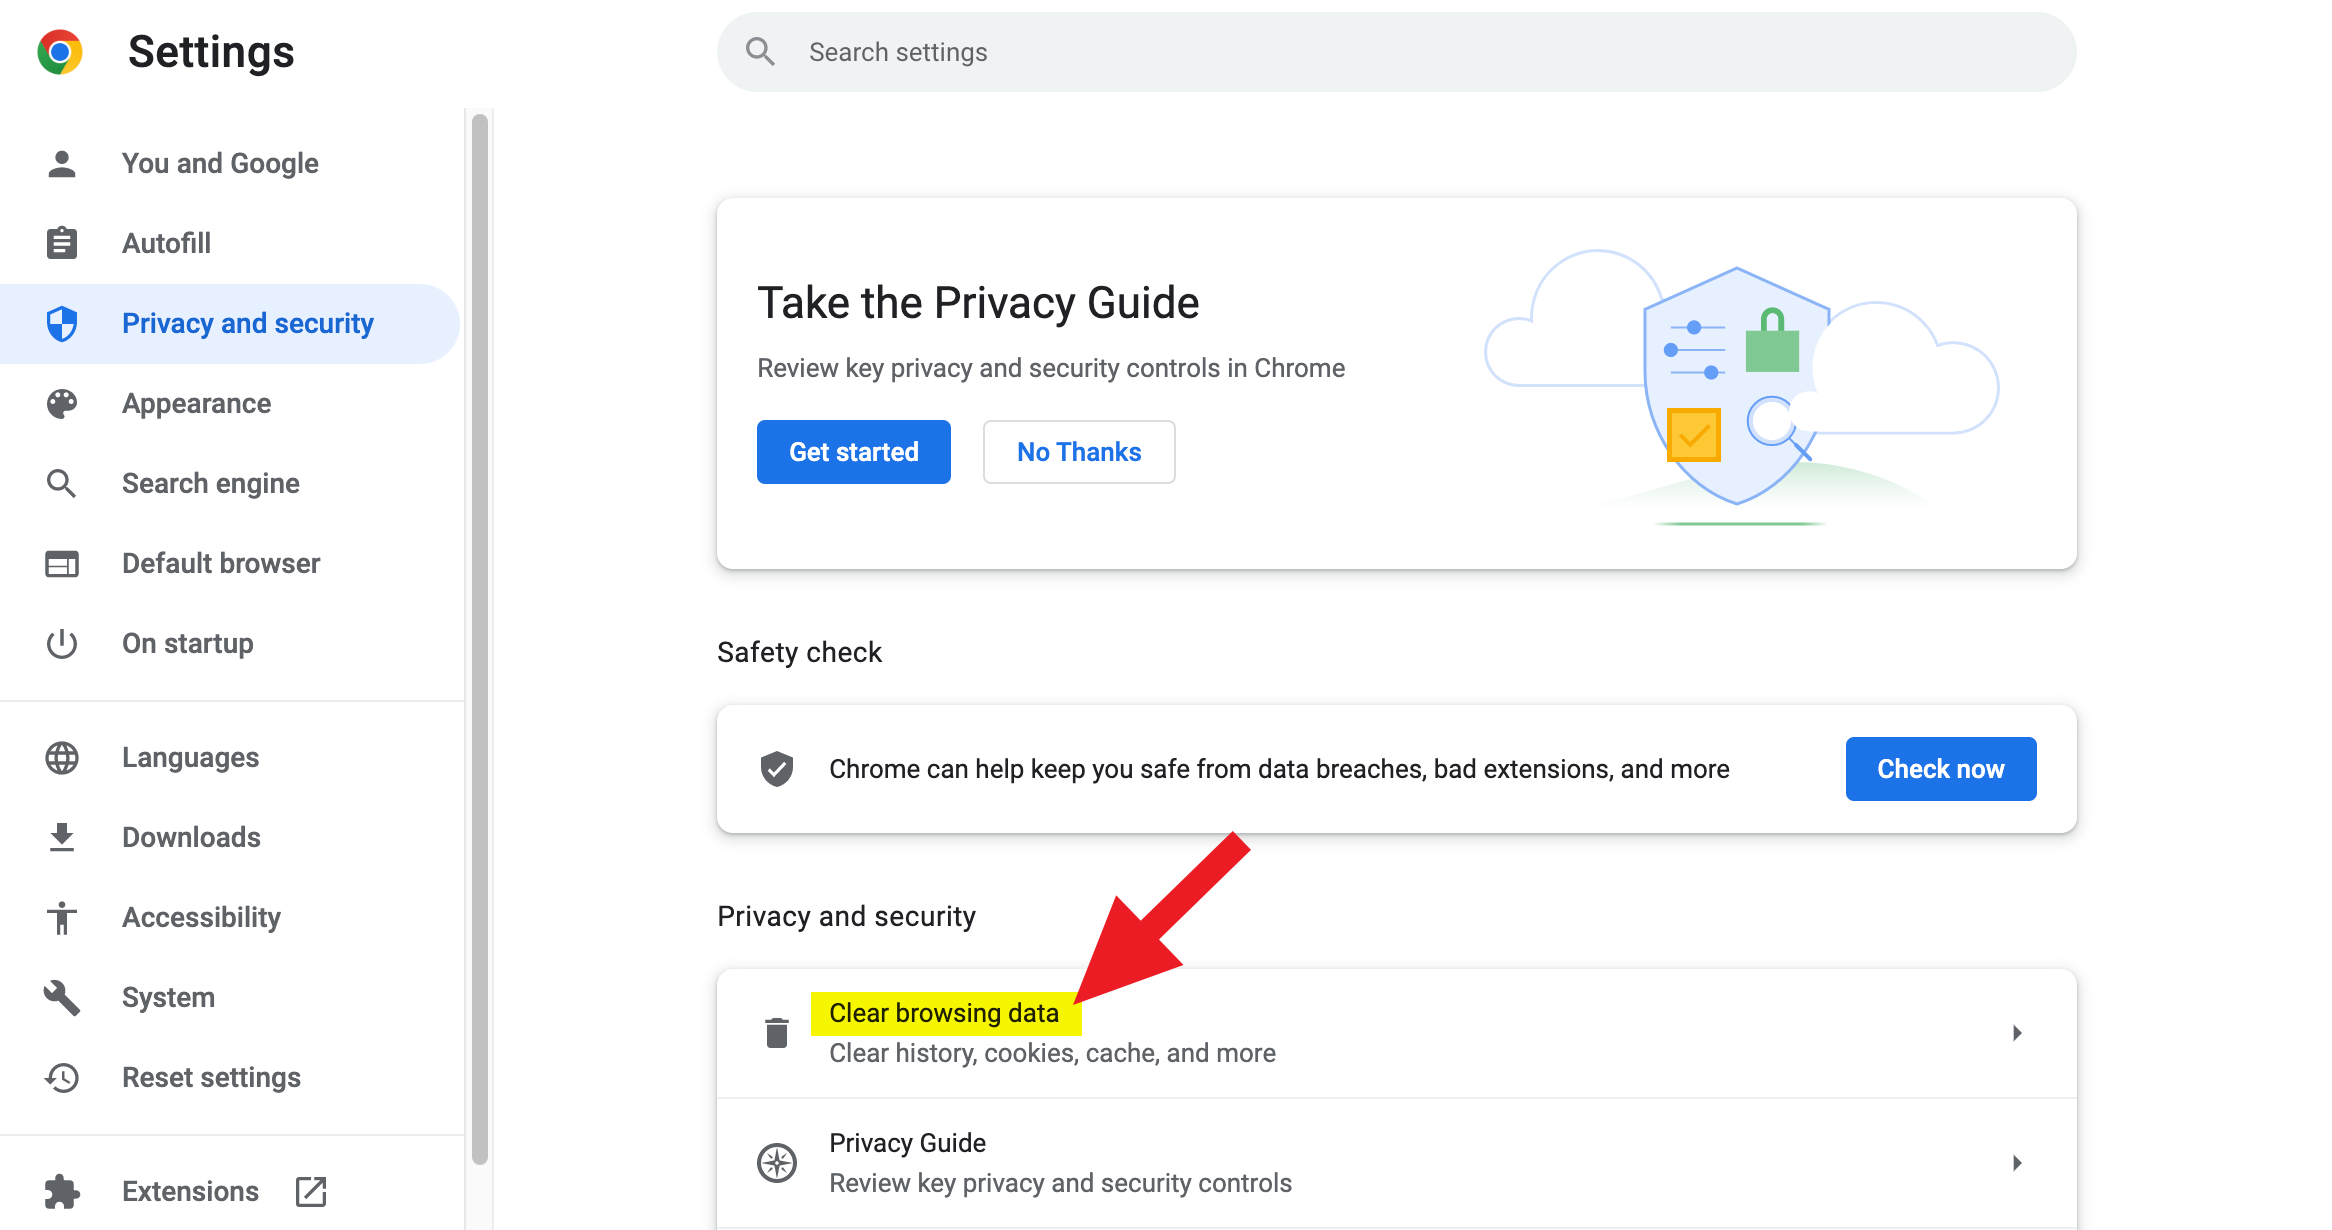
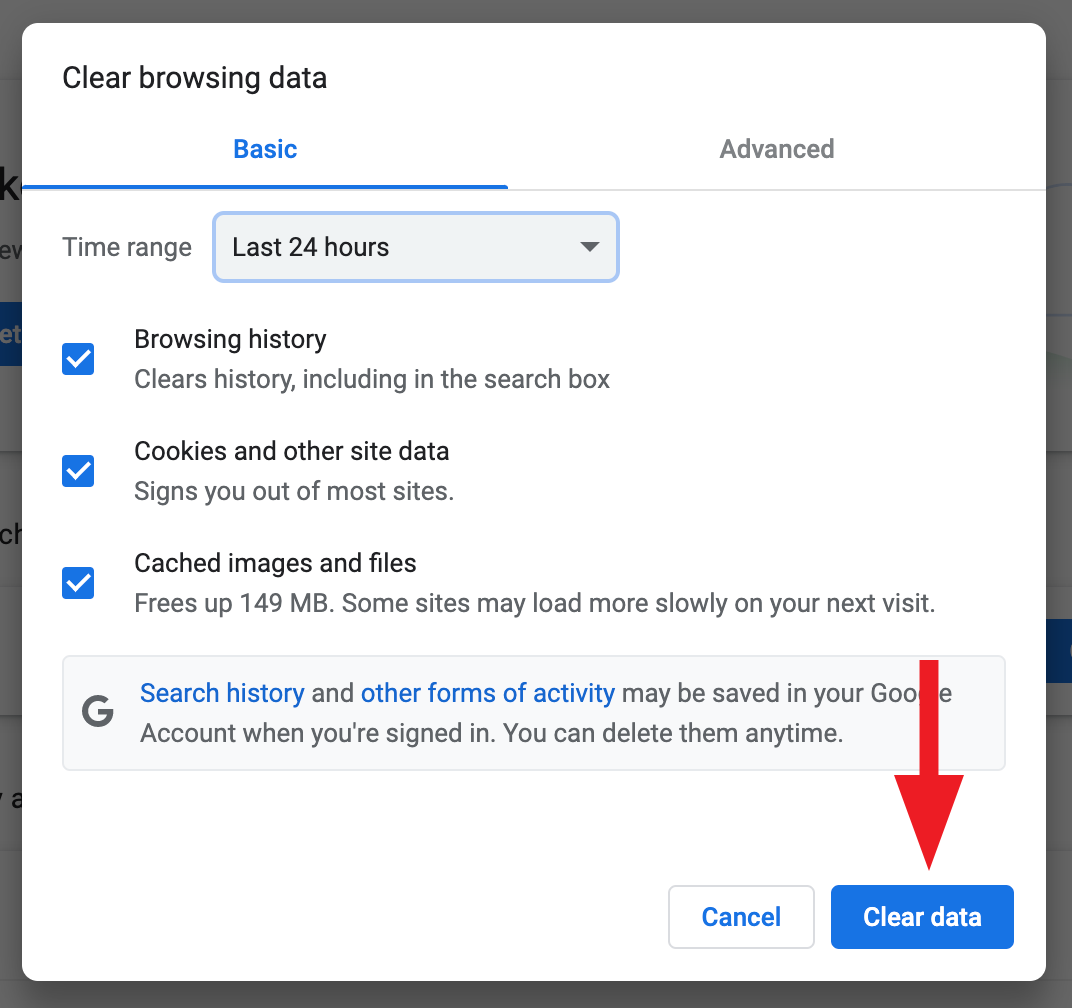
If for whatever reason you have to start your exam session over or you failed to connect to the exam, it’s important to make sure that the Chrome extension is removed before starting over. Below, we’ve outlined the steps you should take to start fresh.
Disconnection:
If you were disconnected from the proctoring session by accident, you can return to your exam with these steps:
1. Log back into Examity to return to the dashboard.
2. Navigate to your exam card and click on the “Return To Exam” button.
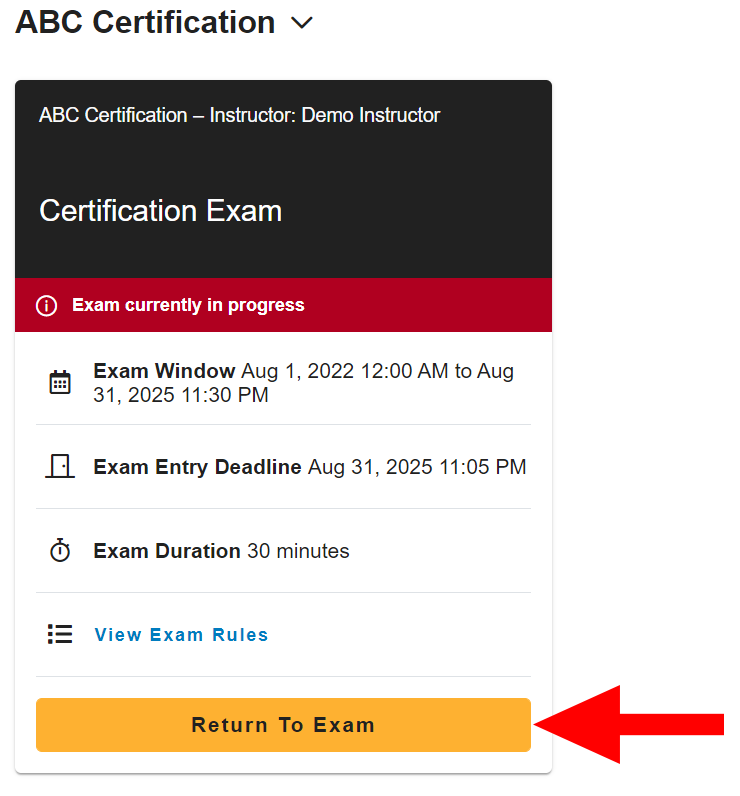
3. Follow the prompts on the screen again and continue with your exam.
Please note: There is a 15-minute window for the “Return To Exam” button to still be displayed. After 15 minutes, the option will disappear.
If your test sponsor allows multiple attempts, you may see an option to start the proctoring session over (please allow a few minutes for it to appear).
If the exam does not appear, you will need to contact your test sponsor to allow for a second attempt.
For assistance, call the relevant phone number listed on our Test-taker Resource Center page or fill out the form, email [email protected], or chat directly with us through the Live Chat feature on the Examity dashboard.
To expedite your support inquiry, please have your exam ID or course name on hand.
